DISCLAIMER: Links included in this description might be affiliate links. As an Amazon Associate, I earn from qualifying purchases. If you purchase a product or service with the links that I provide, I may receive a small commission. There is no additional charge to you! Thank you for your support so I can continue creating free content each week!
Over the course of RV ownership, you’ll find that knowing how to blow out your RV water lines is imperative for maintaining a healthy plumbing system. This process not only protects your pipes from freezing during colder months but also helps keep your water lines clean and clear. In this guide, you will learn the step-by-step method for effectively using an air compressor to blow out your water lines, ensuring your RV is ready for any season.
Understanding the Need for Blowing Out RV Water Lines
While RVing can provide an exciting adventure, it’s crucial to understand the necessity of blowing out your water lines. Properly winterizing your RV’s water system prevents freezing water from expanding and damaging the lines, which can lead to costly repairs and hassle during your travels. Taking the time to blow out your water lines ensures that they remain in good condition, ready for your next getaway.
Preventing Damage from Freezing
There’s a significant risk of water freezing in your RV’s lines if you store it in cold temperatures. When water freezes, it expands, which can cause your plumbing to crack or rupture. To avoid this, use an air compressor to blow out the lines before winter storage, protecting your investment from potential damage.
Maintaining Water Quality
Quality is key when it comes to your RV’s water system. Blowing out your water lines not only prevents freezing but also helps eliminate stagnant water, ensuring a fresh supply when you’re ready to use your RV. Regular flushing of the lines can prevent mold and bacteria growth, which is vital for your health and enjoyment while traveling. (Make it a habit to perform this maintenance each season.)
To maintain the water quality in your RV, it’s crucial to regularly flush the water lines. This process removes any contaminants that may have accumulated over time, providing you with clean and safe water for cooking and drinking. Additionally, consider replacing any inline water filters before blowing out the lines for maximum effectiveness. (Taking these steps will greatly enhance your RVing experience.)
Essential Tools for the Process
Assuming you want to effectively blow out your RV water lines, having the right tools on hand is important. The two primary tools you need are a blow out plug that connects to your RV’s city water inlet and an air compressor capable of supplying a substantial volume of air. With these tools, you can ensure your freshwater lines are secure and ready for seasonal changes.
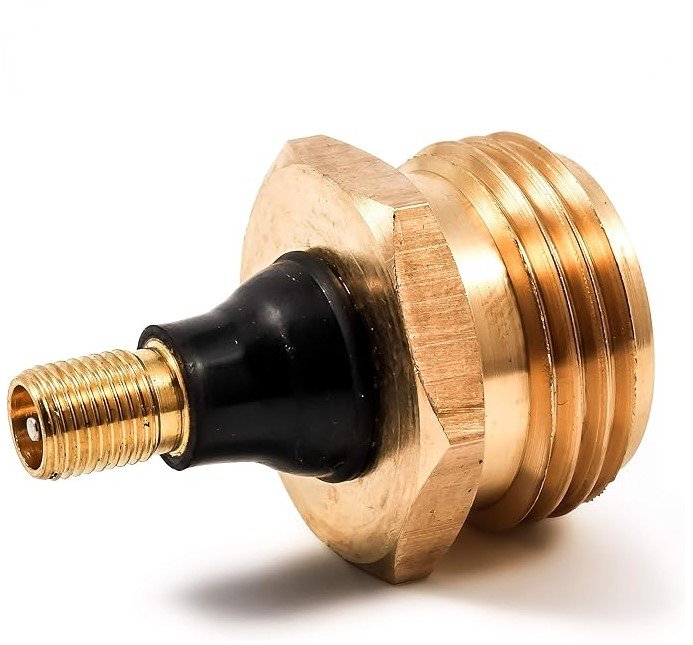
Selecting the Right Blow-Out Plug
Right from the start, choosing a blow out plug that couples easily with your air compressor’s hose will enhance your experience. Opt for the type that allows for direct connection, reducing the hassle of manipulation during the process. This makes it easier and more efficient to blow out your water lines, ensuring you can complete the task smoothly.
Choosing an Appropriate Air Compressor
Appropriate air compressor selection is vital for an effective blow out process. Aim for a model with a reserve tank of at least 10 gallons, as this will provide the necessary air volume for efficient line clearing. Set the air pressure between 30 and 40 PSI to prevent damage to your water lines, ensuring a safe and effective winterization procedure.
Plug your air compressor into a power source and adjust it to the recommended pressure levels. With a minimum of 10 gallons in the tank, you’ll find the airflow sufficient to efficiently remove residual water from your RV’s plumbing lines. This not only protects against freezing but also ensures your system is clear of any unwanted moisture that could lead to growth or clogs.
Safety Precautions
It is necessary to prioritize safety when blowing out your RV water lines to prevent accidents and damage. Before starting the process, ensure you have the right tools and equipment, and always work in a well-ventilated area. Additionally, take some time to become familiar with the specific components of your RV’s water system to avoid any potential mishaps.
Preparing the Water Heater
Little steps make a big difference. Start by turning off your water heater and allowing it to cool down. This helps you avoid burns and prevents damage to the heating element when draining the tank. If your water heater heats via electricity, ensure that the 120 VAC power supply is completely turned off for safety.
Handling Compressed Air Safely
The use of compressed air comes with its own set of safety considerations that you should not overlook. First, always wear safety goggles and appropriate hearing protection while operating the air compressor. This ensures you are protected from any potential debris or loud noises that could be harmful. Additionally, understand the appropriate pressure settings; keep your air compressor set between 30 and 40 PSI to safeguard your water lines from damage. Never direct compressed air towards your face, and avoid over-pressurizing the system.
Safely managing compressed air is vital for both your equipment and personal safety. Maintain a safe distance from the air outlet and ensure that all connections are secure before powering on the compressor. Familiarize yourself with the equipment, including the blow out plug, to reduce the risk of accidents. Always check for any leaks in your air hose that could pose a safety hazard, and remember to release any trapped air in the system once you are finished to avoid sudden pressure changes.
Step-by-Step Process for Blowing Out RV Water Lines
Keep your RV’s water lines in top condition by following these imperative steps to effectively blow them out. Each step will ensure that no water remains in the lines, protecting against damage from freezing temperatures.
| Steps | Description |
| 1. Prepare your RV | Turn off the water heater and bypass any inline filters. |
| 2. Attach the blow out plug | Screw the blow-out plug into the city water inlet. |
| 3. Set air pressure | Adjust the compressor to 30-40 PSI. |
| 4. Connect and open faucets | Open each faucet until no water exits. |
| 5. Blow out toilet valve | Depress the flush until no more water exits. |
Preparing Your RV
Water lines need to be properly prepared before you begin blowing them out. First, ensure the water heater is off and the water has cooled to prevent burns. Bypass any inline water filters to allow unrestricted airflow through the system.
Executing the Blow-Out Procedure
Process each faucet systematically to ensure all water is expelled. After attaching the blow-out plug and adjusting your air compressor, open one faucet at a time. Wait until water stops flowing before closing the faucet and moving to the next one.
Plus, when you finish with the faucets, don’t forget to blow out the toilet valve, and if your RV features an ice maker or washer, follow the manufacturer’s guidelines to clear those lines too. This thorough method will help you confidently prepare your RV for winter or the off-season, ensuring your water lines remain intact and leak-free.
Additional Considerations
To ensure your RV’s water system is fully protected and efficient, consider a few additional factors. These include turning off valves, managing water pressure, and being mindful of any water lines that could still contain moisture. Taking the time to address these aspects will help you avoid costly repairs and extend the lifespan of your RV’s plumbing system.
Addressing Inline Water Filters
The removal of inline water filters is vital before you blow out your water lines. Neglecting this step could result in damage to the filter or restricted airflow.) Be sure to safely store these filters during the winterization process to maintain their integrity for future use.
Maintaining Other Water Appliances
Even though the focus is primarily on your water lines, don’t overlook other appliances connected to your RV’s water system. Failure to properly maintain these appliances can lead to leaks and damage.
Water heaters, ice makers, and clothes washers may also retain moisture if not addressed. Make sure to blow out their lines following the manufacturer’s guidelines and inspect for any standing water that could cause freezing. By taking these extra steps, you safeguard not just your water lines but your entire RV plumbing system.
Troubleshooting Tips
Unlike straightforward tasks, blowing out RV water lines can come with its own set of challenges. Here are some troubleshooting tips to help you along the way:
- Make sure the air compressor is supplying sufficient volume.
- Check for any clogs or blockages in your water lines.
- Ensure all faucets and valves are opened fully.
- If there’s minimal airflow, verify that your blow out plug is properly sealed.
You should not overlook these crucial checks for a successful blowout process.
Identifying Common Issues
One way to tackle problems is to identify common issues before they escalate. (Being proactive can save you time and money.) Look for signs such as water still dripping from faucets after air has been applied or unusually low air pressure readings during the process.
Ensuring Complete Water Removal
Troubleshooting your RV water lines effectively hinges on ensuring complete water removal. Conducting a thorough blowout is the key to preventing frozen pipes. After blowing out each faucet and fixture, inspect for any residual water, as any remaining water can cause damage during winter.
Complete elimination of water from your RV lines is crucial to protect against freezing. Utilize both your air compressor and gravity by checking all fixtures systematically. Thoroughly inspect all components, including toilets and ice makers, to confirm no water is left behind. Every detail matters to ensure a successful winterization.
Conclusion
Hence, knowing how to blow out your RV water lines is necessary for protecting your freshwater system from damage during freezing conditions and for maintaining optimal performance. By using an air compressor and a blow-out plug, you can effectively clear your water lines and prevent potential issues related to standing water or leaks. Regularly practicing this technique not only prepares your RV for winter but also ensures your system remains leak-free during the camping season.
After blowing out your lines, some people add non toxic anti-freeze to the lines using a RV Pump Converter Winterizing Kit to draw anti freeze from the jug through your water lines. This is a fairly easy process and will definitely ensure the safety of your water system through winter storage.